Last updated on November 4th, 2024 at 08:25 pm
How to get your Business Show up in Bing Local Search Engine Listings? Beginners Tips for Bing Local SEO based Marketing.
A Step By Step Guide on How to Add your Business to be Showed in Search Engine Result Pages (SERPs) in Bing Business Listings for Local Search Engine Traffic.
7 Steps Beginners Guide on How to List your Business on Bing Local Places
Local Listing or citations is always an important factor in SEO and also to promote online businesses in an efficient manner. Also with the local listing, you can provide your business a better online visibility, right information about your business to your customers and traffic on your online business website. Thus, on that note listing on listing sites is one of the best ways to be in the eyes of your targeted audience.
See Also: Top 10 Search Engines List
For the same there are many good listing sites are present on which doing listing can help to acquire more good positions in SERPs as well. And Bing listing is among one of those listing platforms. So, how to get your business listed on Bing is our today’s topic.

7 Steps to Get your Business Listed in Bing Local Listing Pages
Find out how to get free marketing and SEO opportunity with Bing Local listing. How to List or Add your Business in Bing Local Places – A Step By Step Guide for Beginners on How to enlist your Business to Show up in Bing Local Search Engine. Be Found in SERPs.
So here are the 7 steps to follow to make your business listed on Bing:-
1. Make An Account at Microsoft Bing
Yes, the very first step includes making a Microsoft account. So, first of all, make a Microsoft account with any of the Microsoft supporting accounts including Xbox live, Outlook, Hotmail, and Onedrive.

After creating Microsoft account just head towards the “Bing Places” by following the link. After that click on the “Get started” yellow button, it will lead you towards a screen where you can search for your business.
3. Add or Claim your Business Listing

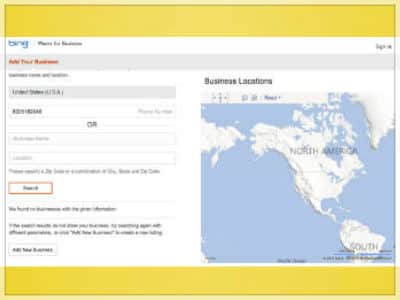
As mentioned in the #2 point, search for your business (on the screen or page on which Get started button headed you.) Here you can search for your business in two ways – either you can select your country from the drop-down list available and entering the business phone number or by entering the business name and location of the firm (complete business address).
Once you fill up the details for searching business thereby clicking the search button, it will show you the results based on your search.
It just means that it will show results in both the cases whether your business is present in its database or not by presenting results with that name (if the company is already listed) and by showing “Create New Business” button (if not present).
Thus, on that note, you can simply claim, edit or modify your listing by choosing the select button if the business already exists and can create a new business by clicking “Create New Business” button if not.
4. Sign in into your Microsoft Account
If your business is not listed, then you have to list it by creating it. Once you click on Create New Business button for creating a new business, it will head you towards the login page of the Microsoft account.
Thus, here you have to login to your Microsoft account to create a Bing business listing of your business.
The Main 3 Steps to Add your Business to Bing Local Listings:
5. Claim your Business: Add Your Business Details-
Bing categories the businesses in three main types. Select what option applies for your business and click on the link.
#1. Small sized Local businesses that have a store front.
#2. Chain businesses that have their offices in multiple locations.
#3. Businesses that provide services at their customer locations.
After login, it will bring you to the page where you have to fill up the business details of your business which includes Business name, Website, and Address of business ( in the first step ) (Here it also needs to set the pin to the exact business location).
It will ask for Category and description of your business in the second step.
And in the third phase, it will ask for contact details (which includes the Main Phone number, email, Facebook, and Twitter), in fourth step – business hours, and in last pictures or Photos of business. (Where you can add up to 10 business images) Once you have done with all the info filling work you submit it.
6. Verify Your Business Listing

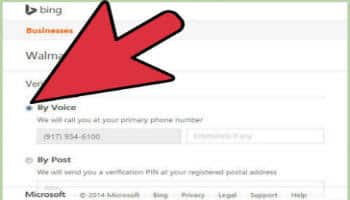
As soon as you submit all the information of your business, it will ask you to verify your business. Here you will see the option of verification “By Post.” You can choose this option to get verified your business with the PIN sent by Bing via Postcard.
The time which Bing takes to send the PIN through postcards takes 3-5 business working days.
For the same, you have to choose this option and then mentioning the name of the owner of the business in “Attn” field. And then clicking on the Verify now option. (You can also select the verify later option next to “Verify Now” if you want to authenticate it later).
Once you do so, it will head you towards to your listing page (unverified), where you will see a box on the right-hand side named “verification.”
Here, you have to enter your PIN sent by Bing as soon as you receive it and then have to click on the green “Verify button.” Once you will do it, your Bing listing will get verified and will be visible in SERPs (i.e., Bing Local Search Result Pages) as well.
You can also add multiple businesses or new business thereby clicking on “Add new business” available on the same listing page. (If have chain business or franchise business)
7. Manage Your Listing
Once your Bing listing gets approved after entering the PIN, you can edit, update and delete the listing depending on your need.
Hope this article will help you all, in a realistic manner to get your business listed on the Bing Business Listing. So, please let us know by sharing and putting your views in the comment box below.
Also don’t forget to show your love thereby sharing the post on different social media platforms– Facebook, Twitter, Emails, Instagram and so on, if you like the post. In this manner, it will help others as well and supports the quote of “Sharing is Caring.”
Search Engine Optimization Tips for Bing Business Listing Page
Once you have successfully added your business website url to Bing local the next big thing would be to make your business listing more Search Engine Optimized for better search rankings in Bing local listing search pages for the related queries.
#1. Add high quality, SEO optimized, and authority images to your listing page. (pictures about your business, service, testimonials, and products may play an important role for many reasons, including SEO, marketing, and leads)
#2. Encourage your users to publish reviews about your business. ( You can do so by asking your customers, website visitors to submit their experience about your business services on your Bing listing page. )
#3. Add tags and categories for your business listing correctly after making a good keyword analyses( You can use Google Keyword Planner Tool to find out the most appropriate, apt, and worthy keywords for your business)
#4. Make Use of your Bing business listing page url as if you would make of your website url. Insert the list in your social profile page, group, Whatsapp, and other social media platforms (Twitter, Facebook, Instagram, etc).
#5. Show your Bing business listing page in your website, social media profiles, business card, etc. You should embed your Bing local listing page as your business address map in your website pages (contact page, testimonial page, etc).
Bing, Yahoo search engines count for more than 10% search queries across the World. Though, they are no where near to Google local listings, but you should focus on Bing local page as it is also used by a significant number of people. It is next best thing after Google!
| ➤ PDF Submission Sites for SEO |

